

Setting up your new Honeybook account? You just made an awesome choice. Honeybook is a powerhouse tool for running your business, and one of the things I’ve used the longest in my own business.
This software does SO many things to help you manage your business including sending invoices and contracts, workflows and automations, email templates, scheduling calendar appointments and calls, and so much more! In the video below and throughout this post, I’m going to walk you through exactly how to get started with Honeybook by a step by step guide to setting up your company settings within a Honeybook account.
Just getting started? Grab your free Honeybook trail here (and you’ll get 30% off your first year using my link! 🎉)
One of the first things you’ll want to do in our Honeybook setup is personalize your account within company settings! The reason for this is because it allows your brand and colors to be consistent inside Honeybook. That way when someone inquires with you, they are seeing a cohesion between your website, social media, and honeybook.
You get lots of flexibility for how you set up your account including notification settings and more.
Let’s get your brand, your colors, and your preferences in place right from the start. In addition to that, you can set up your account integrations, bank details, add team members if needed, and even connect your lead form so that new leads flow directly into HoneyBook without extra work.
Getting Started with Honeybook | How to Add Your Custom Branding to Honeybook
Your Company Details
When you first open your Honeybook account, you’ll open up to the dashboard. From there, you’ll want to click on the right hand corner and go to “Company Settings”. Once in there, you’ll build your “professional presence”. This is where you’ll setup your company name, your email address, phone number, company type, and your website.
Once you have these details in, scroll right below to “Brand Elements”. This is where you’ll add your logo, brand colors, and your default header image. That defult header is what will be pulled into your brochures, smart files, and templates when you create them but you can easily change this image later. On the right hand side, you’ll see a preview header so you can see exactly what your clients will see when you are sending files to them. Something important to note is that you can change these settings when you are ready to send the files if you’d like so you have flexibility in that.
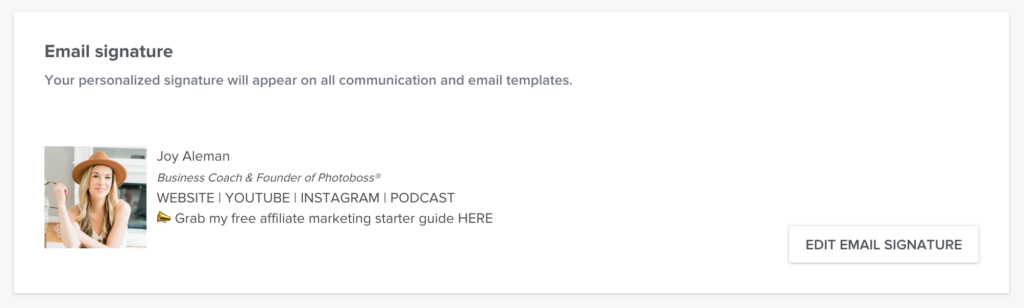
Email Signature
After you have your company details setup, you can then move into setting up your email signature. You can click on the block to open up the editing settings. From there you can add your logo, your company information, and even hyperlink your website or social media handles too. You can choose to have your photo on the left hand side if you like instead of your logo.
This is a great way to have a clean and polished look to your email templates and have consistency throughout your account. Finally, you can add additional details about your company below the email signature. Some people include more basic info, I like to have a simple sentence sharing more about what I do in my business.
Want to grow followers on a specific platform? I recommend linking it in your email signature!
Social Links
At the very bottom of the company settings page, you can find a bunch of places to include your social media links. This can include your Instagram, Facebook, Pinterest, and more. Be sure to include the links to each of your different platforms so they are easy for your clients to locate. Lastly, you can include optional info underneath with your address if you like too.
These are the basic building blocks to getting your Honeybook account looking the way you visually want. This really helps your Honeybook account look and feel like YOU!
Preferences
The next block you’ll want to move through to setup all of your settings in Honeybook is “Preferences”. Your “Preferences” tab can be found on the left-hand side. This will allow you as the business owner to decide what things you want to hear about and what you don’t as well as what you want your clients to be notified about. This will also help you avoid things like sending payment reminders out to clients that you did not want to send to them.
Go through each of the preferences one by one and decide what you want to be notified about. You also have a “Notifications Center” tab on the right hand side. You can find this by clicking the bell icon in the corner. One of my favorite preferences that I always have on too is “Expire proposal after 2 weeks” to ensure that someone does not book me 6 months after I send their proposal. Make sure to go through each of the small details in this section because they will serve you really will in your business.

Final Settings
Finally, you want to go in and setup your bank details so you can get paid!! This will allow you to get paid and have the money transfer directly to your business bank account.
You’ll also want to setup your integrations too. Honeybook allows you to integrate with platforms and software outside of it, which is SO nice to keep yourself organized. Integrations can include your Quickbooks account, Gmail Chrome plugin, calendar integrations, and Zoom or Slack channels.
Grab yourself a Honeybook account today and get those settings dialed in. (This link will get you 30% off your first year – woohoo!)
There you have it! You’ve now setup your Honeybook settings and your account can look professional and consistent for your clients.
You can also check out additional Honeybook videos on my YouTube channel that I’ve linked below. I’d LOVE to hear what some of your favorite takeaways were from this post.
Some of the links on this page are affiliate links, which means if you choose to use them I will get a small commission but you pay the same price. Thank you for using my links and helping support my small business.
You May Also Like:
Steps To Booking A Photography Client: Honeybook Onboarding Workflow
How To Use Honeybook For Your Photography Business
Take 30% Off Your First Year Of Honeybook
Join Photoboss Facebook Community
5 Time-Saving Honeybook Features

")
